
Sticker sheets are a bit tricky so we have no hard specifics for them as they all differ! Below we will do our best to walk you through the basics.
Basics of a sticker sheet:
The sheet itself is a die cut (the cut goes all the way through the vinyl and backing).
The sticker items contained within a sticker sheet are kiss-cuts (the cut goes through the vinyl but -not- through the backing).
Standard guidelines we use when proofing include:
1. Artwork MUST be 300 dpi or higher at the desired print size.
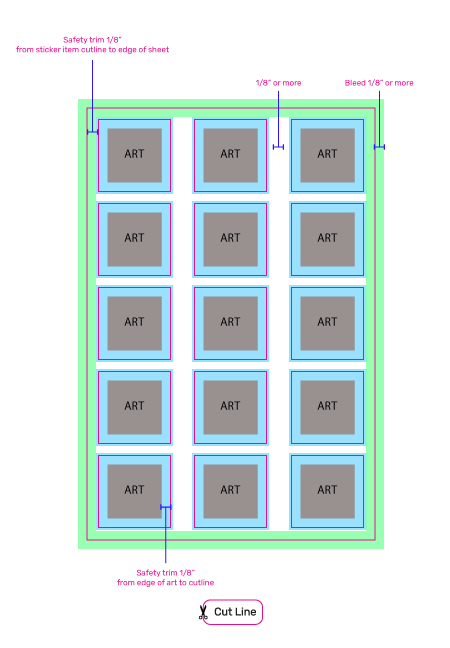
2. Safety trim 1/8″ for the overall sheet. (Space between the edge of the kiss-cut stickers and the edge of the sheet.)
3. Safety trim 1/8″ for each kiss-cut (peel away) sticker on the sheet. (Space between the edge of the art and edge of the sticker.)
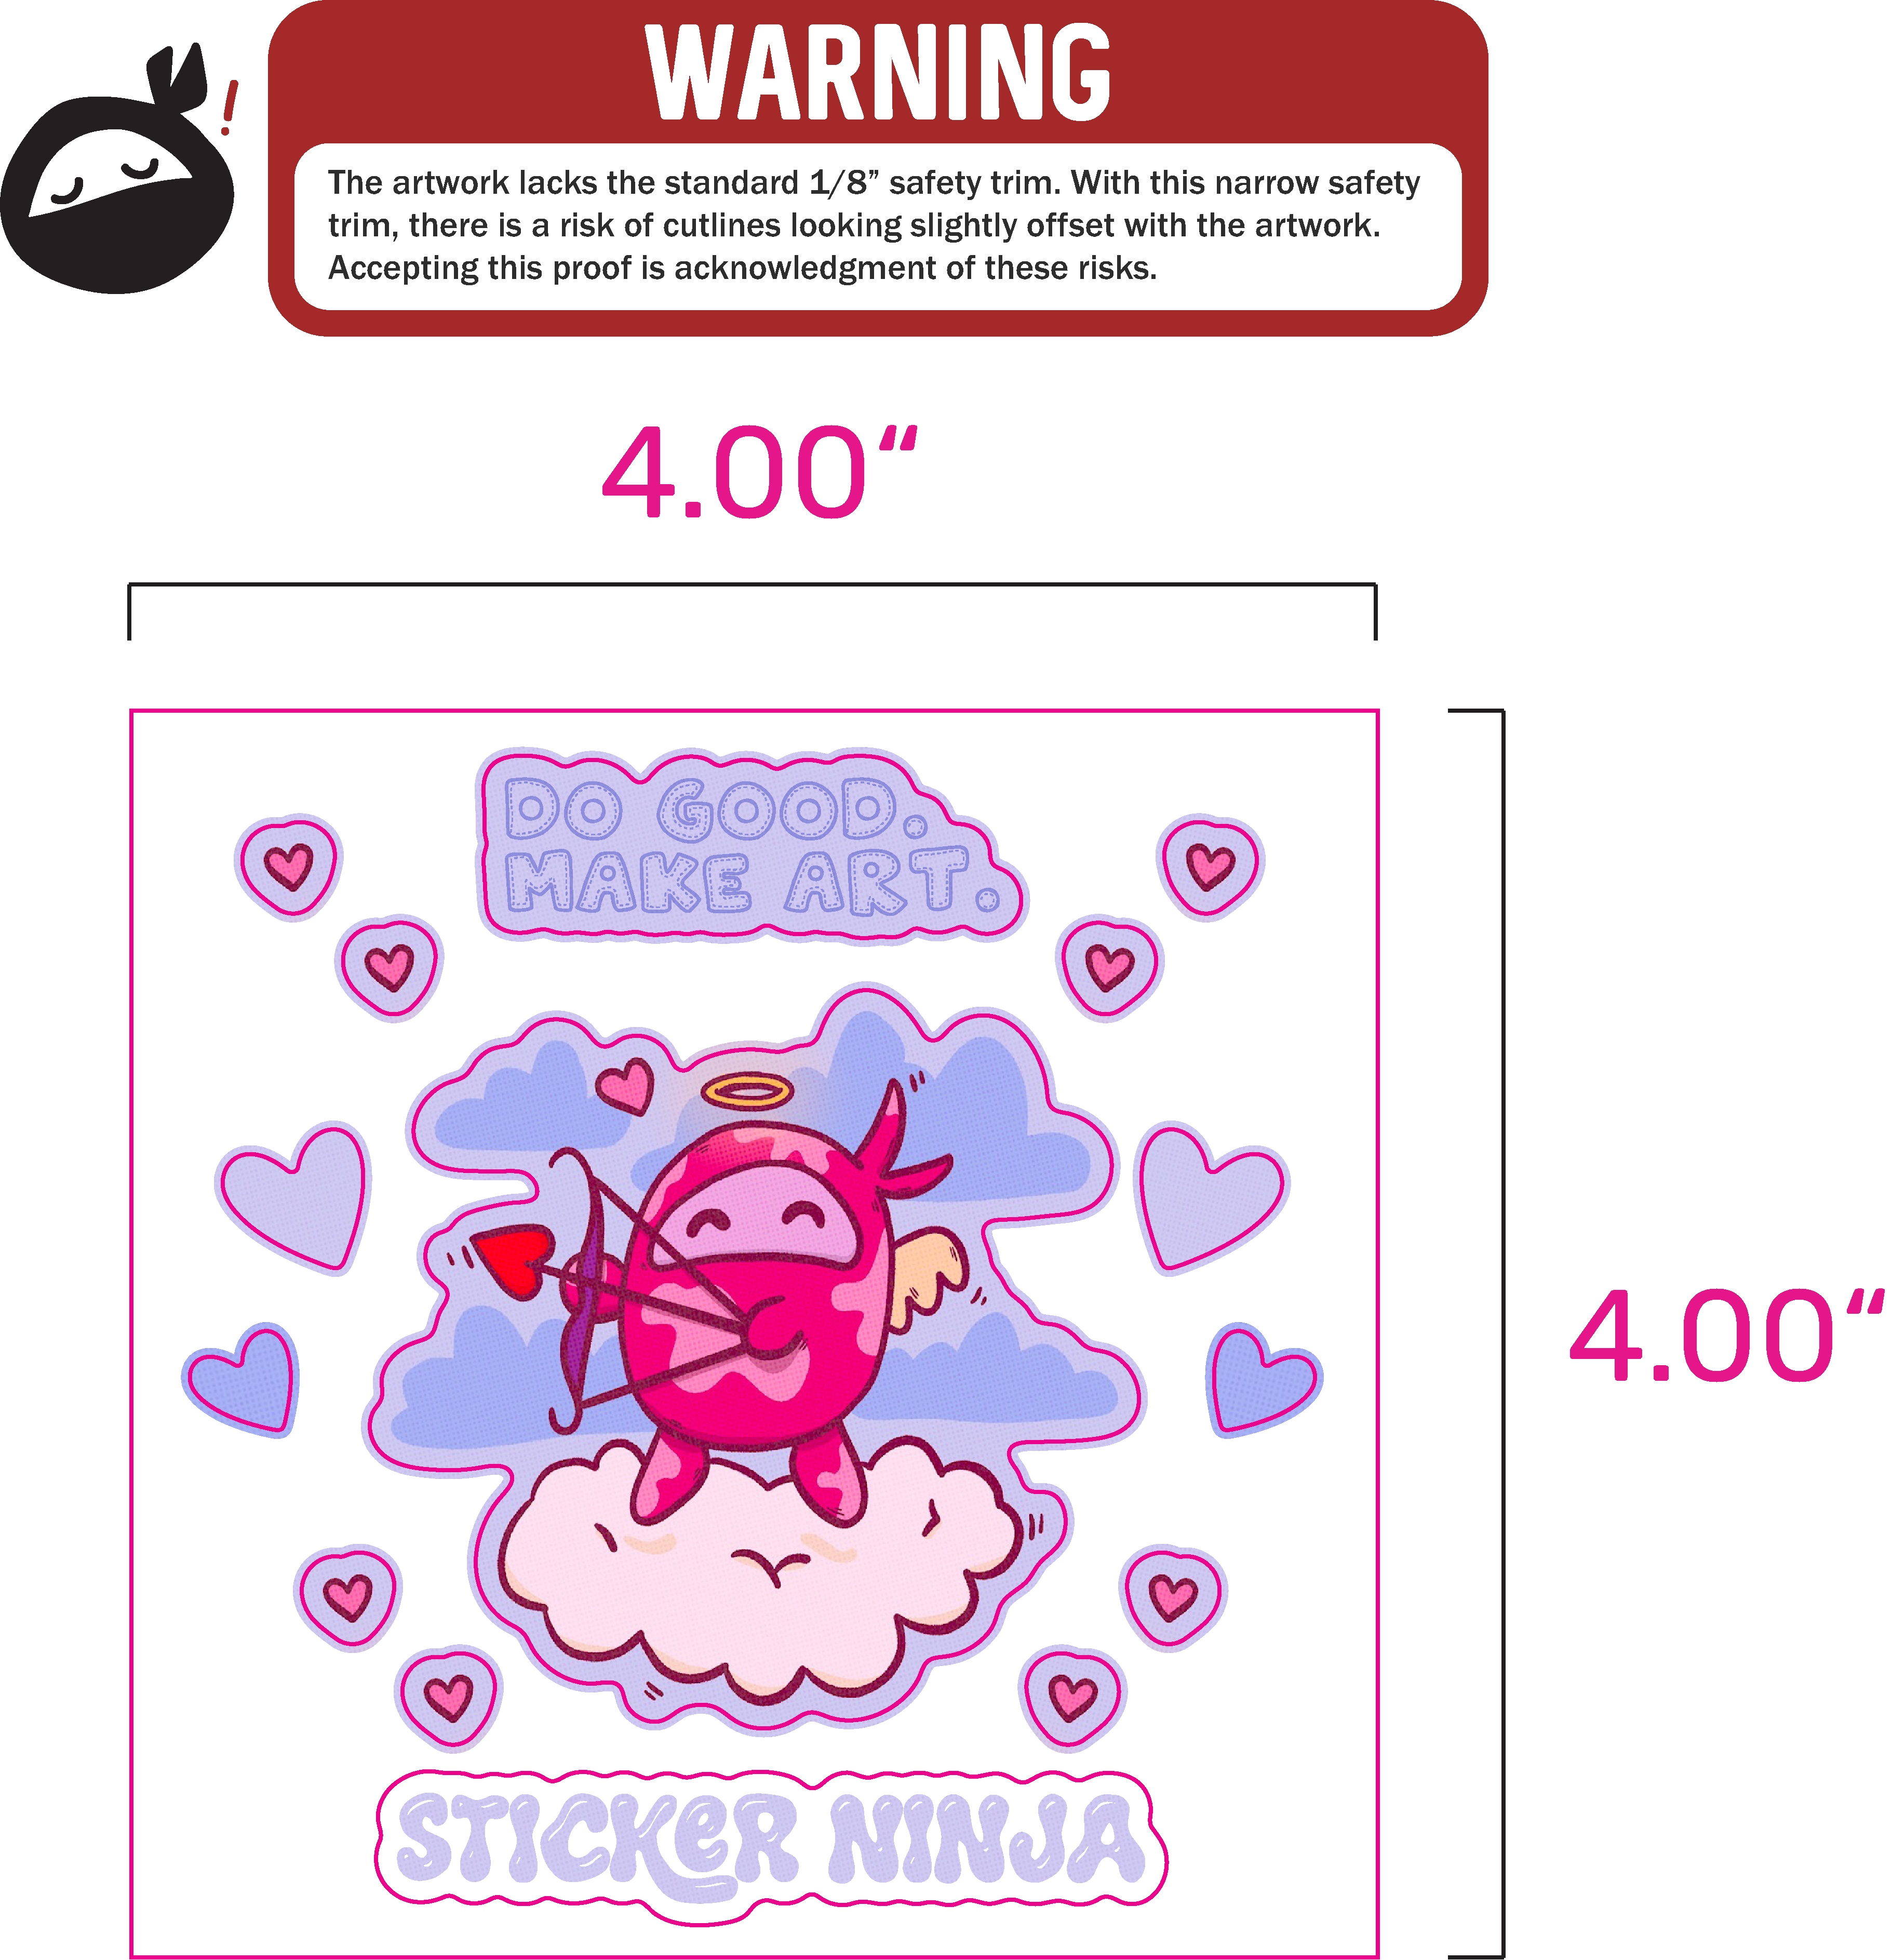
*Our safety trim of 1/8″ (.125″) is our standard so stickers do not look visually offset once printed. It is common for sticker sheets to have slimmer safety trims due to general smaller sizing of sticker items. Any sheets that have a safety trim slimmer than our standard 1/8″ (for either sticker items or sheet) will come with a warning at the top of the proof.
Some tips to get you started:
1. Image Quality: Make sure your images are at least 300 DPI or higher at the desired print size! Do not include the canvas/artboard/bounding box in the measurements. Work in a higher dpi than you need! We recommend always working with 600 DPI (at the desired print size) that way things can be scaled up to twice their size if needed and still be high enough res for print! Plus printing things at 600 DPI gives even more crisp results which is always a good thing!
2. Spacing: Ensure at least ¼” (0.25″) of space between each kiss-cut sticker on the sheet to accommodate for the cutlines. (We are aware there’s software with no measuring tool (e.g. Procreate) so this one is tricky, if you’re not able to measure that’s where tip #4 comes in <3)
3. Bleed: If your sheet has a background, make your canvas .5″-1″ larger than you want the sheet in both directions to accommodate plenty of room for a full bleed! (i.e. if you’re doing a 4″x6″ sheet work in a 4.5″x6.5″ (or larger) canvas and leave at least a half inch around the edges with no text or sticker elements in this area).
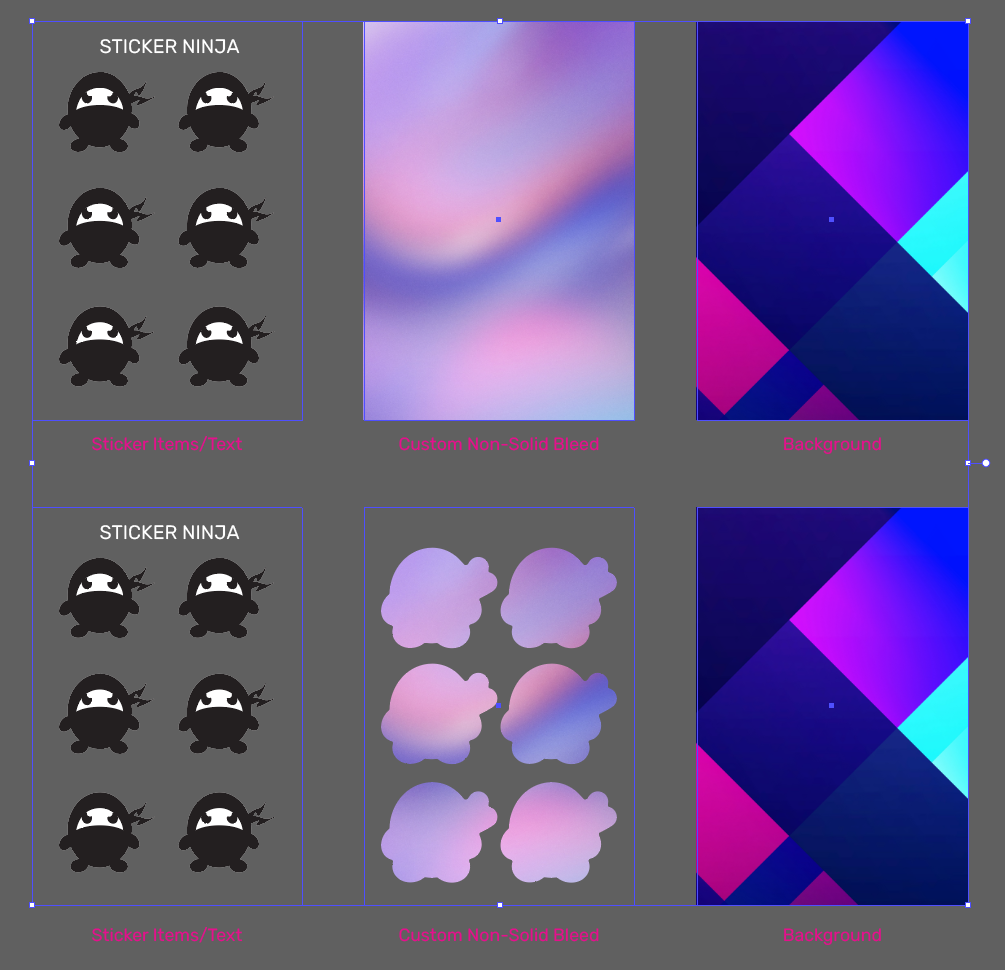
4. Additional Files: These are most optimal! Be ready to separate elements on their own layer so you can export them as transparent background PNGs (or TIFFs, if working in CMYK)! (So one layer as the background and one layer as sticker elements. If you have additional items such as text or custom bleeds: one layer as the text and one layer as the custom bleed). We frequently email for the background and sticker elements as separate PNGs so that we can adjust spacing on our end as needed! No need to include any solid color bleeds/borders around the sticker items, we prefer to add those in ourselves so they match the cutlines 🙂
Side Note for Procreate Users: If you export the layers as a PDF it still doesn’t preserve the layers and just comes through as one flat image. So we suggest going through one at a time and turn on just the background layer > export as PNG, and then just the sticker layer > export PNG. That’s the only way we’ve found to get individual layers from Procreate into Adobe Illustrator (the software we use to process stickers).
5. Our website uploader accepts only one file when ordering. If you have layers or any additional files to go with your order you may email us at support@stickerninja.com. Don’t forget to include your order #!
Below is a rough guide for the basics of a sticker sheet.
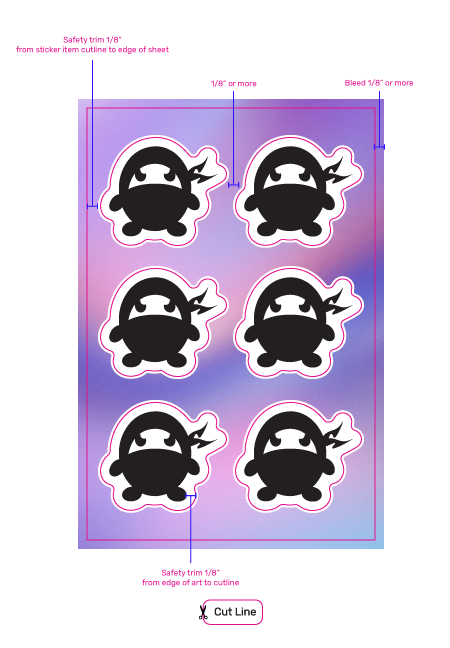
Here is an example of a basic sticker sheet in action.
This is an example of separate PNGs we typically ask for.
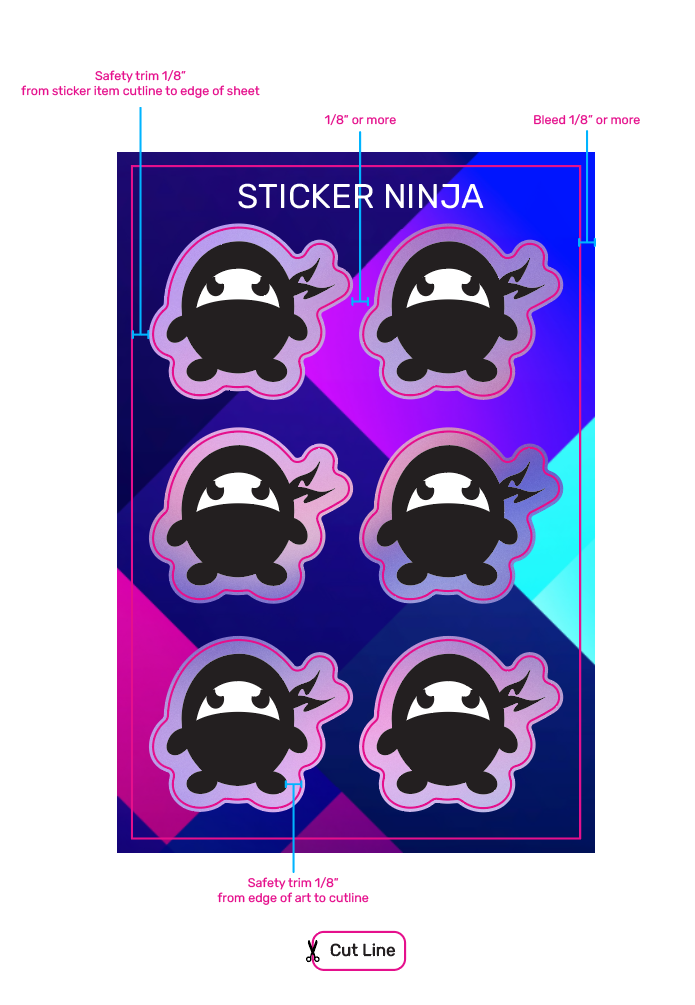
This is how we would layer them together on our end.
Slim Safety Trims:
Sometimes we recommend safety trims outside of the normal range of 1/8″ from sticker edge to artwork. This helps fit many items onto smaller sheets or many items in general. With sheets, more is more! You are paying for the entire surface area of each sheet, so we always recommend getting the most out of that.
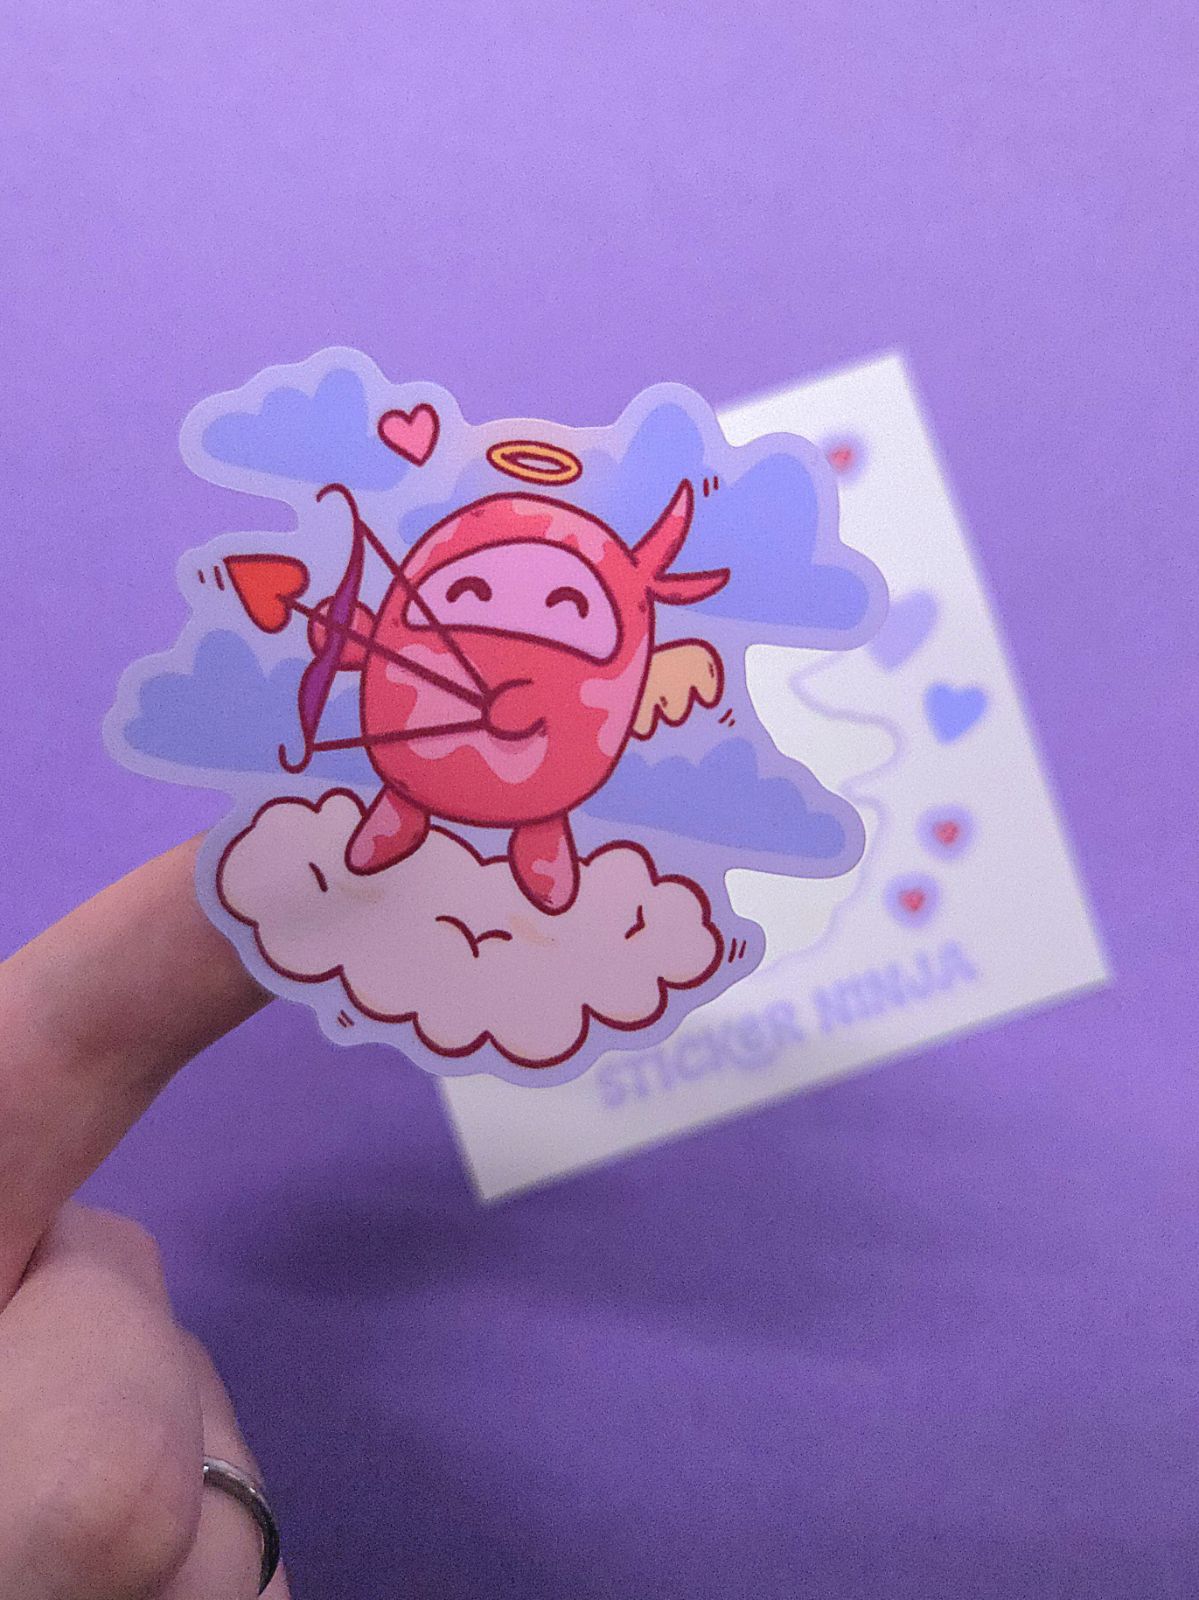
Below is an example of a 4×4″ sheet with slim safety trims. Proofs like this will always come with a safety trim warning at the top of the proof. There is always a risk of items coming out not perfectly centered when we apply the slim safety trims. Though, there is yet another caveat! (many caveats with sheets, but they sure are fun!)
This is more common in die cut stickers. When kiss cut stickers, like the ones found on sheets, have slim safety trim, they are more likely to cut out more accurately.
TLDR: if we recommend this, we encourage you to trust the process. ☻We genuinely care and take our time to problem solve and find out what works best.